To get ready for payroll, you’ll need to turn on Standard Payroll in QuickBooks Online, and then provide some information about your company and employees. After you finish all your setup tasks, you’ll be up and running and can run payroll without having to go to setup again (unless you need to make a change).
Getting set up correctly at the onset ensures that you can run payroll and pay your employees every time without a hitch.
- First and foremost, if you haven't done so already, turn on Standard Payroll.
- Go to Payroll, and under Let's get your business ready for payday, select Let's go.
- Select whether this is the first time you are paying your employees, or if you have paid them before, Next.
Once you’ve finished basic setup, you can also make changes later in your settings. To do so:
- Select Settings ⚙️.
- Select Account and Settings, and then Payroll.
Step 1. Choose the right tax year
Let’s figure out which tax year you’ll start paying your employees in so we can calculate your employee’s tax and National Insurance contributions. The date you pay your employees determines the tax period and tax year it falls into, even if the pay period is different.
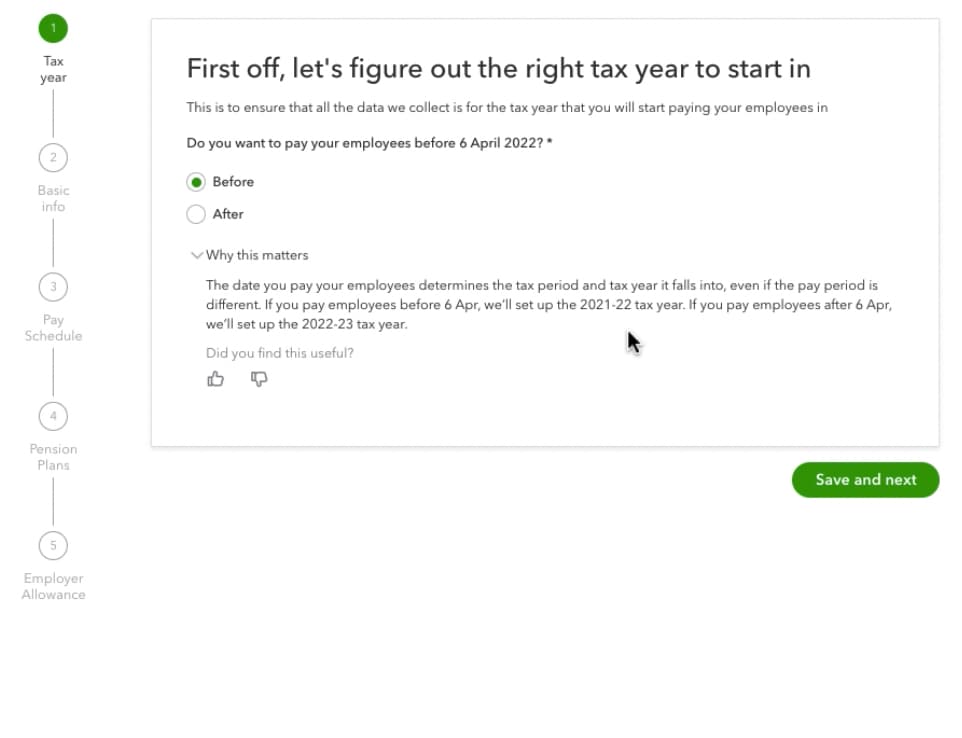
- Select Before if you want to pay your employees before 6 April and we’ll set up the current tax year.
- Select After if you want to pay your employees after 6 April and we’ll set up the following tax year.
- Select Save and next to continue.
Step 2. Enter your basic information
Next, let’s review your name and address to make sure all the forms given to your employees have the correct legal information.
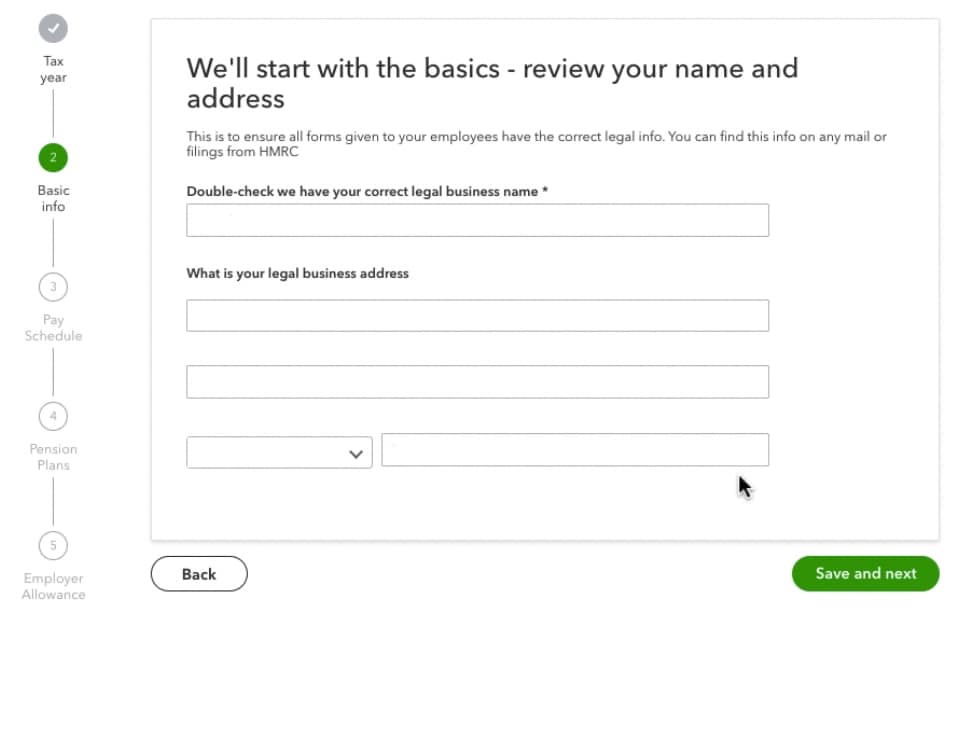
- Double-check that the company name and address is correct. You can make changes here if you need to.
- Select Save and next to continue.
Step 3. Choose the employee pay schedule
Before you save your company pay schedule, decide how often you want to pay your employees. If you’re switching from another payroll software, keep your current pay schedule to avoid tax implications.
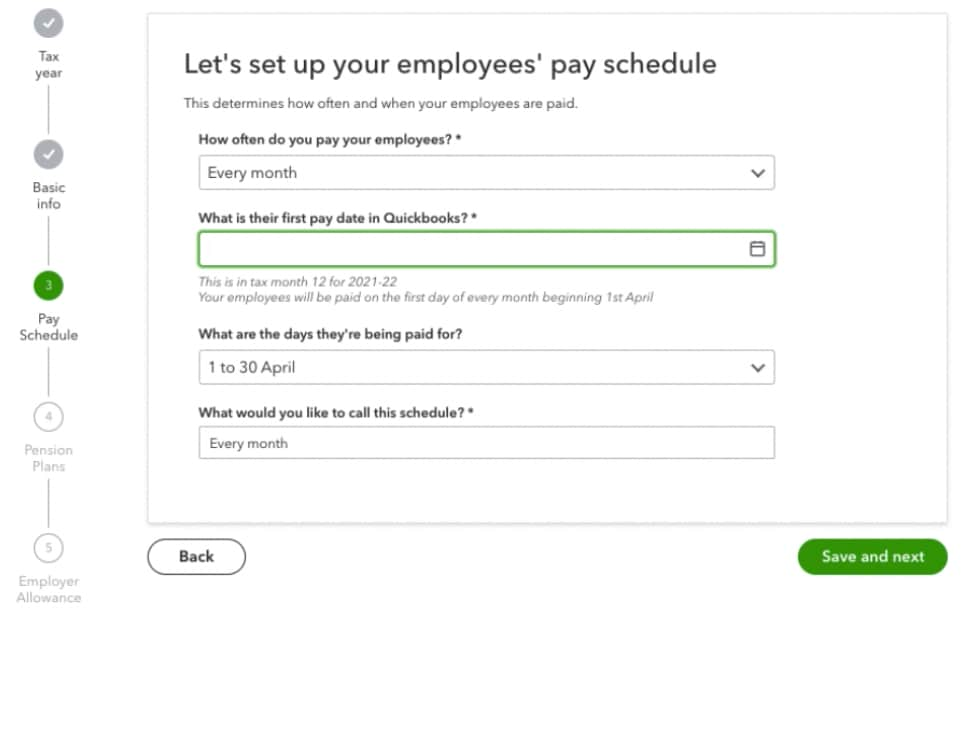
- Select whether you pay your employees every month or every week.
- Choose the date you will first be paying your employees in QuickBooks.
- Select the days your employees are being paid for.
- Enter a name for this schedule.
- Select Save and next to continue.
Note: You can make changes to your pay schedule up until you submit your first payroll. After that you won't be able to make any changes unless you delete the entire payroll.
Step 4. Set up a workplace pension plan
Most businesses qualify as needing a workplace pension for their employees–this is also known as auto enrolment–but not all businesses need to set up a workplace pension straight away.
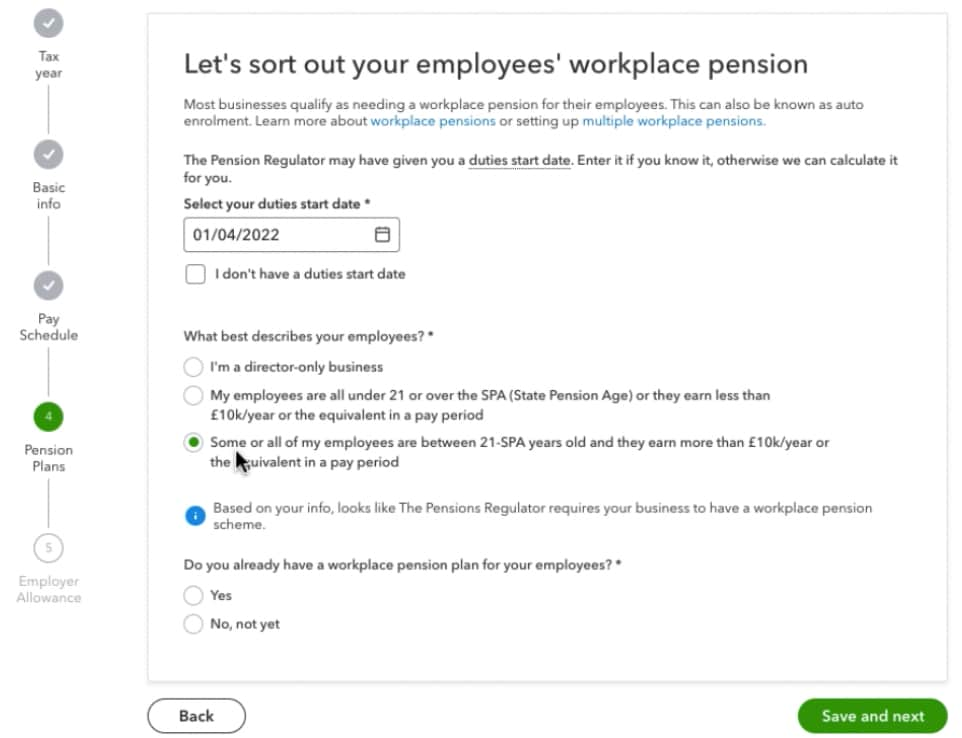
- Select your duties start date if you know it, otherwise we can calculate it for you.
- Choose one from of the following options:
- I’m a director-only business.
- My employees are all under 21 or over the SPA (State Pension Age) or they earn less than 10k/year or the equivalent pay period.
- Some or all of my employees are between 21-SPA years old and they earn more than £10k/year or the equivalent in a pay period.
The first two options do not require you to complete the workplace pension setup.
If you choose the third option and already have a pension plan for your employees, select Add a workplace pension to set this up now. Read our set up a workplace pensions scheme article for more help.
3. Select Save and next to continue.
Step 5. Set up to claim Employment Allowance
Lastly, let’s figure out if you can save on your employers’ National Insurance bill. Check if you qualify here.
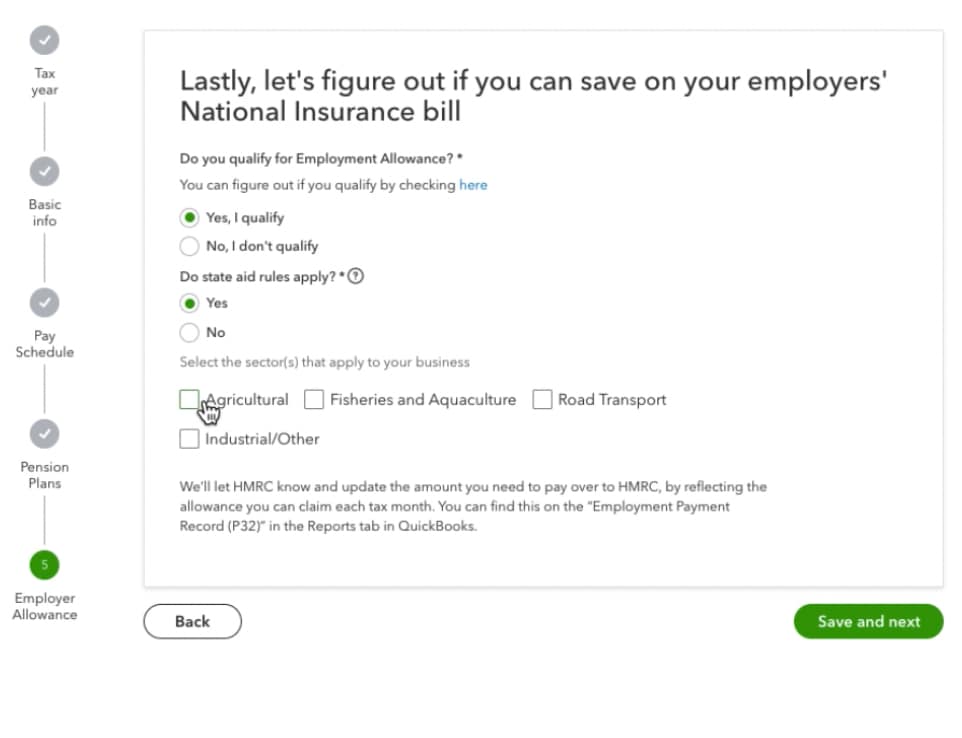
- If you select Yes, I qualify and state aid rules apply, select the sector(s) that apply to your business.
- If you select No, I don’t qualify, don’t worry, this just means you’ll be paying the normal employers’ National Insurance contributions. You can always change this later if you become qualified.
- Select Save and next to complete your payroll setup.
Nice! You’re all set. You can now add your first employee to payroll. When you’re ready, select Run payroll to pay your employees.
Turn on RTI (Real Time Information) reporting
Each time you run payroll, you need to submit an FPS (Full Payment Summary) to HMRC. Switch on RTI so you won't have to enter your Government Gateway credentials each time you run payroll or make an FPS submission.
To save your HMRC credentials:
- Go to Settings ⚙️.
- Select Account and settings, and then Payroll.
- Select the pencil icon next to Online filing with HMRC.
- Enter your details.
- Select Save Gateway credentials.
- Select Save.
Set up Small Employers' Relief (SER)
If you qualify, don’t forget to set up SER.